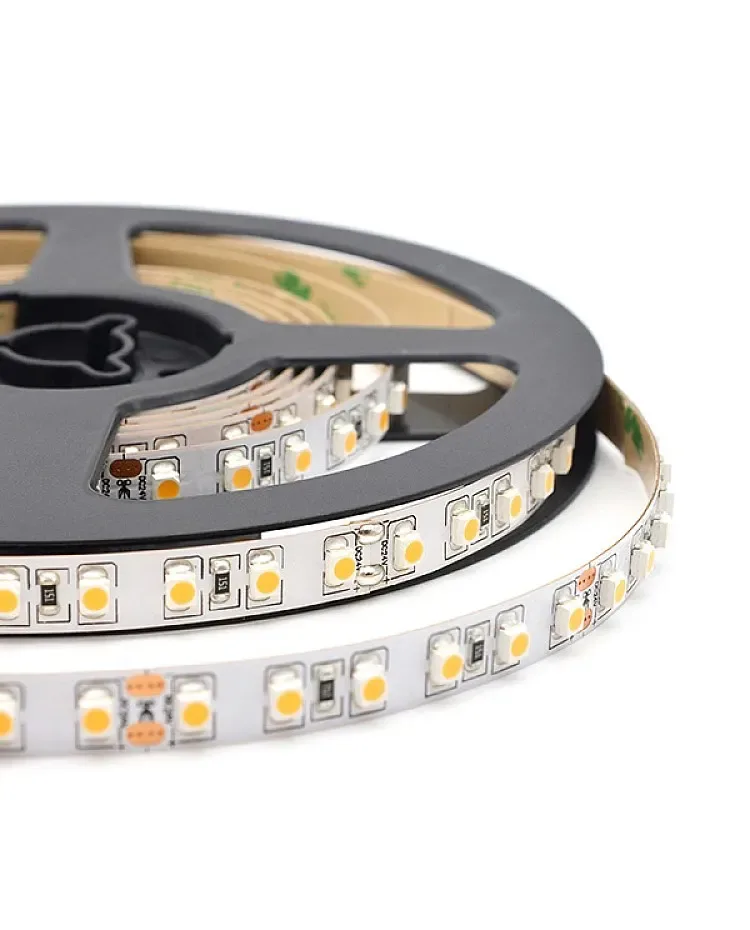
01 / Short answer
A seamless corner is a building-detail decision before it is an LED decision. Select the inside or outside profile, coordinate the finish layer, preserve the strip bend or joint, and keep the diffuser, cable and service access aligned through the corner.
Architects, drywall and tile trades, and installers detailing continuous LED lines at inside and outside corners
CHECKPOINT / 01
Name the corner and the finished plane
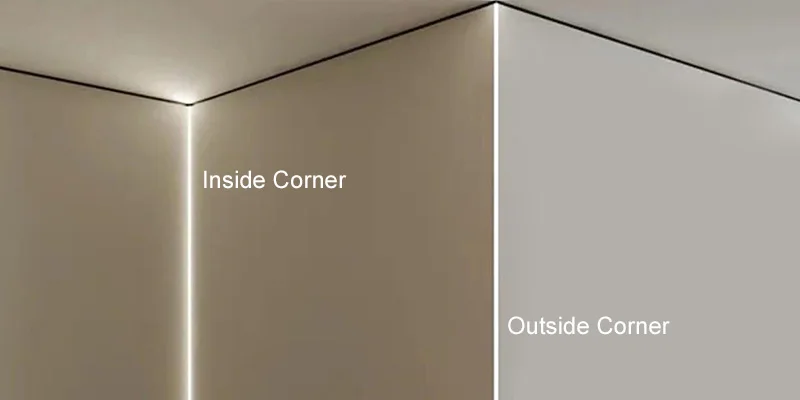
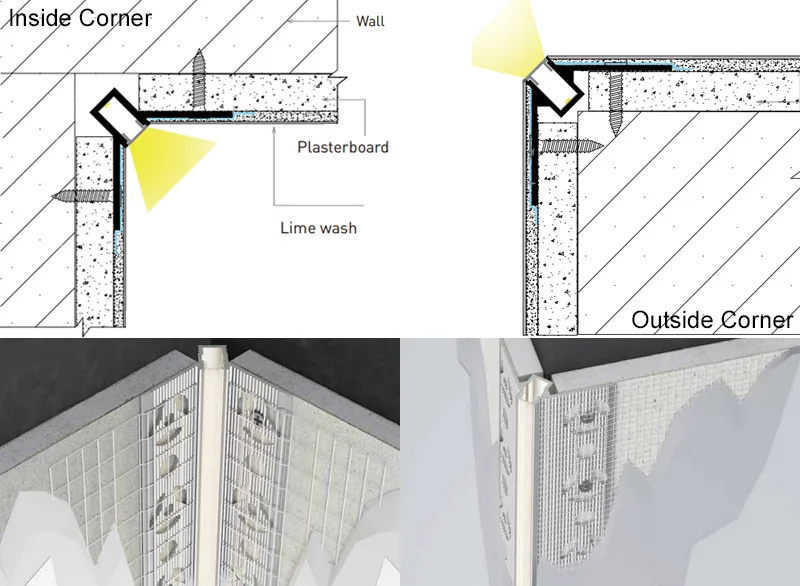
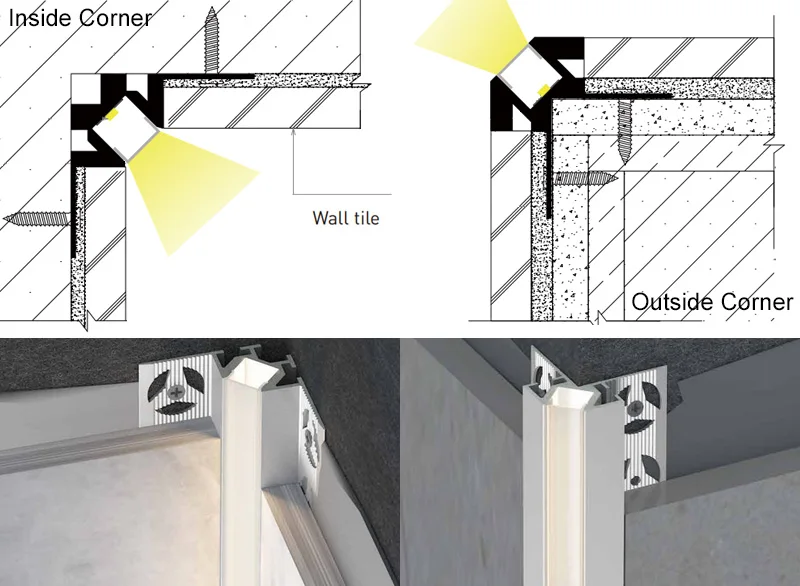
An inside corner is a recessed intersection such as wall-to-wall or wall-to-ceiling; an outside corner projects into the room and is exposed to knocks and visual grazing. The profile shape, flange, diffuser and finish build-up differ between drywall, plaster and tile. Draw the finished planes, not only the structural corner, so the light line lands at the intended depth and angle.
- Mark the final plaster, paint, tile and grout thicknesses.
- Confirm whether the profile is inside-corner or outside-corner geometry.
- Keep the diffuser face flush with the intended finished plane.
CHECKPOINT / 02
Choose a corner profile as a mechanical assembly
A corner profile combines a carrier, diffuser, mounting method and sometimes a reinforcing or finishing edge. Check its inner width, bend or joint strategy, end caps and how the profile meets the straight sections. A profile that looks seamless in a catalogue can still create a visible break if the diffuser, strip density or corner cut is inconsistent. Approve a short corner sample before the trade fixes the surrounding material.
- Match the strip width and height to the channel cavity.
- Plan straight-to-corner transitions and access to the cable exit.
- Do not use a straight profile forced around a sharp corner.
CURRENT PRODUCT RECORDS
2835 flexible CCT LED strip View productCHECKPOINT / 03
Detail the strip path before the finish
The strip can follow the corner only within its bend direction and minimum radius. If it cannot turn safely, cut at a valid interval and use a corner connector or soldered lead with enough pad and strain relief. For an addressable strip, preserve data direction. Keep the joint out of the highest-glare point and leave a service loop at the nearest accessible end.
- Avoid folding a flexible PCB across the corner apex.
- Label polarity, channel order or data direction on both sides.
- Keep the joint height below the diffuser clearance.
CHECKPOINT / 04
Coordinate drywall, plaster or tile sequence
A plaster-in detail may require a prepared slot, profile fixing, mesh or crack-control layer, skim coat and paint. A tile detail also depends on tile thickness, adhesive bed and edge alignment. The electrical test must happen before the final finish hides the strip, while the finish must be installed without blocking the diffuser or service access. Coordinate the profile drawing with the trade responsible for the surface.
- Fix the profile without deforming its diffuser channel.
- Protect the light cavity from plaster, adhesive, grout and paint.
- Keep end caps and the service route accessible after finishing.
CHECKPOINT / 05
Approve the line from the room, not the bench
Test the straight section, corner and next straight section together at the final CCT or color, brightness and viewing distance. Inspect the corner for a dark point, hotspot, shadow, diffuser mismatch and surface irregularity. Check voltage and temperature at the corner joint, then record the profile, strip, cut interval, connector or solder method and final finish. A seamless visual result needs a repeatable installation record.
corner_path = straight_a + turn + straight_b
optical_check = no_hotspot && diffuser_continuity
service_check = joint_access && end_access
VISUAL REFERENCES
See the layers before you specify the parts.
FAILURE MODES
What usually goes wrong
- Inside and outside corner profiles are treated as interchangeable.
- The finished plaster or tile thickness is ignored until the diffuser sits proud of the wall.
- The strip is folded at the corner and the PCB or solder pads are damaged.
- Plaster, grout or paint enters the channel and prevents the diffuser from seating.
- The straight run looks correct on a bench but the corner is not tested from the room sightline.
TECHNICAL BASIS / VERSION
Keep the decision current
This guide is maintained as a versioned technical record. Recheck the current protocol documentation and the exact product revision before using it in a production installation.
Confirm the selected voltage, light engine, driver, controller, firmware and installation conditions against the product record and project brief.
FAQ / QUICK ANSWERS
Common questions about this lighting setup
Can I bend an LED strip around a 90-degree corner?
Only when the strip bend direction and radius support it. Otherwise cut at a valid interval and use a suitable corner connector or soldered lead with strain relief.
What is the difference between an inside and outside LED corner profile?
The two profiles present different mechanical faces and finish interfaces. Choose from the actual recessed or projecting corner and the final drywall, plaster or tile build-up.
When should I test a built-in corner light?
Test the strip, joint, profile and diffuser before the final finish hides them, then test again from the room sightline after painting or tiling is complete.
READING LIST
Reference points used for this guide
The page is rewritten for LumaCircuit readers. These references establish the original topic or technical context; they do not replace an exact product review or a LumaCircuit test record.
- Reference / localized technical tutorial